

This guide celebrates your new 4L60E rebuild manual, offering a roadmap for successful operation. Automakers sought fuel economy solutions, leading to the 4L60E’s development.
What is the 4L60E?
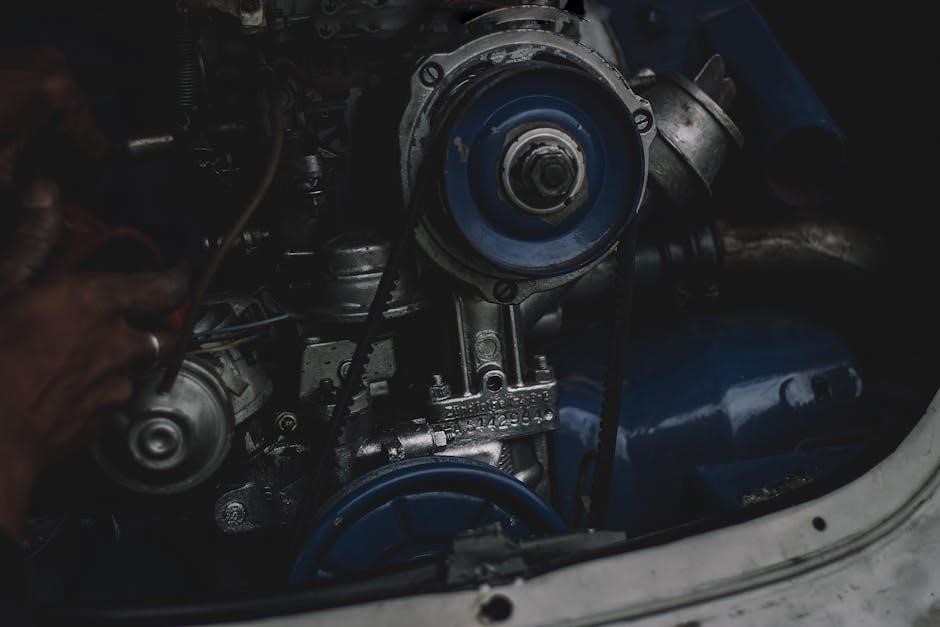
The 4L60E is a four-speed automatic transmission widely utilized by General Motors vehicles from 1992 through 2002, and even beyond in some applications. It’s an electronically controlled version of the earlier 4L60 transmission, offering improved performance and reliability. This transmission is known for its versatility, appearing in a diverse range of vehicles, from trucks and SUVs to passenger cars. Understanding its core components and operation is crucial for successful rebuilding, as detailed within this manual.
History and Applications
Emerging around four decades ago, the 4L60E arose as GM addressed fuel economy concerns, transitioning from carburetors to electronic throttle body fuel injection. Initially introduced in the early 1990s, it quickly became a staple in Chevrolet and GMC trucks, vans, and SUVs. Its applications expanded to include passenger cars like the Camaro and Firebird. This widespread use means a substantial demand for rebuild knowledge, making this manual an invaluable resource for technicians and enthusiasts alike.
Why Rebuild a 4L60E?
Rebuilding a 4L60E is often more cost-effective than replacement, especially given its prevalence in popular vehicles. Common issues like worn clutch packs, failing pumps, or valve body malfunctions can cause slipping, harsh shifting, or complete failure. A rebuild, utilizing a TransTec overhaul kit and professional guides like ATSG manuals, restores performance and reliability. Proactive rebuilding prevents further damage and extends the transmission’s lifespan, saving significant expense long-term.

Tools and Materials Required
Successful rebuilding demands essential tools, specialty items for the 4L60E, and a comprehensive overhaul kit containing replacement parts for optimal results.
Essential Tools List
A robust toolkit is fundamental for a successful 4L60E rebuild. You’ll require a full set of standard hand tools – sockets, wrenches, screwdrivers – alongside precision measuring instruments like micrometers and dial indicators. A hydraulic press is crucial for bearing installation and removal. Don’t forget safety gear: gloves and eye protection are non-negotiable. Torque wrenches, in both inch-pound and foot-pound ranges, are vital for accurate fastener tightening, preventing damage. A good parts cleaning station will also prove invaluable.
Specialty Tools for 4L60E
Beyond standard tools, the 4L60E demands specific instruments. An ATSG (Automatic Transmission Service Group) manual is highly recommended, often accompanied by their specialized tool sets. These include piston ring compressors, seal drivers, and snap ring pliers designed for the transmission’s internals. A valve body airflow tester is essential for proper hydraulic function. Sun gear tool and clutch pack compressor are also critical. Investing in these tools ensures accurate work and prevents component damage during the rebuild process.
Parts and Overhaul Kits
A comprehensive overhaul kit is fundamental for a successful 4L60E rebuild. TransTec kits are popular, containing essential components like friction clutches, steel plates, seals, and gaskets. Consider OEM performance parts for enhanced durability. Replacement parts often include the pump, valve body, and hard parts. Prioritize quality; cheaper alternatives may compromise longevity. Always verify kit compatibility with your specific 4L60E variant before purchasing, ensuring a proper fit and optimal performance post-rebuild.
Disassembly Procedure
Begin by removing the transmission, then perform an initial inspection. Carefully separate components step-by-step, documenting each stage for reassembly clarity and efficiency.
Removing the Transmission
Prior to removal, disconnect the driveshaft, shift linkage, and all electrical connectors. Support the transmission with a jack to prevent damage during separation from the engine. Carefully remove the bolts connecting the transmission to the engine, ensuring no obstructions remain.
Lower the transmission slowly and steadily, checking for any resistance. Once clear of the vehicle, position it securely on a workbench for disassembly; Remember to drain the fluid completely before proceeding, and label all disconnected parts for easier reinstallation.
Initial Inspection and Assessment
After removal, a thorough visual inspection is crucial. Check for external damage, leaks, and the overall condition of the housing. Note any obvious signs of wear or broken components. Assess the fluid condition – metal flakes indicate internal damage.
Rotate the input and output shafts, feeling for roughness or binding. Document all findings before disassembly; this initial assessment guides the rebuild process and identifies potential problem areas requiring focused attention.
Component Separation – Step-by-Step
Begin by removing the tailshaft housing, carefully marking its orientation. Next, detach the pump assembly, noting the gasket’s position. Separate the valve body, exercising caution to avoid damaging delicate valves.
Systematically remove the reaction sun gear, input shaft, output shaft, and planetary gear sets. Label each component clearly during disassembly to ensure correct reassembly. A professional rebuild guide, like ATSG’s, is invaluable during this process.

Internal Component Inspection
Thoroughly examine the valve body, pump, gear train, and clutch packs for wear, damage, or scoring. Identify any components needing replacement or refurbishment.
Valve Body Examination
The 4L60E valve body is a complex hydraulic control center, demanding meticulous inspection. Look for worn or sticking valves, damaged solenoids, and evidence of debris accumulation. Check all passages for obstructions, ensuring proper fluid flow. Pay close attention to the separator plate and gasket for leaks or damage.
Inspect the manual valve detents and ensure smooth, positive engagement. A rebuild kit typically includes new valves, solenoids, and gaskets, crucial for restoring proper function and preventing future issues. Thorough cleaning is paramount before reassembly.
Pump Inspection
Carefully inspect the 4L60E pump for wear on the gears, housing, and drive hub. Check for scoring or damage to the pump bushings, which can significantly reduce oil pressure. Examine the pump inlet screen for blockage, as this restricts fluid flow and causes operational problems.
A worn pump drastically impacts overall transmission performance. Replacement is often recommended during a rebuild, especially with high mileage. Ensure proper alignment and torque during installation to prevent premature failure and maintain optimal hydraulic pressure.
Gear Train Analysis
Thoroughly inspect all 4L60E gear train components – planetary gearsets, sun gears, and ring gears – for wear, chipping, or broken teeth. Check the condition of the needle bearings supporting these gears; any damage here leads to excessive play and noise.
Pay close attention to the forward and reverse clutches’ related gears. Replace any worn or damaged parts as a set to ensure proper mesh and longevity. Proper gear clearances are crucial for smooth shifting and overall reliability.
Clutch Pack Evaluation
Carefully evaluate each 4L60E clutch pack for signs of wear, glazing, or burnt friction material. Measure the steel plates for flatness and discard any that are warped. Inspect the clutch pack seals and backings for damage; replace them as part of a complete overhaul.
A TransTec overhaul kit typically includes new friction and steel plates. Ensure proper clutch pack clearances are maintained during reassembly for optimal performance and longevity of the transmission.

Rebuild Process – Step-by-Step
Begin with the valve body rebuild, followed by pump reconstruction, hard part replacement, and precise clutch pack installation for a successful 4L60E rebuild.
Valve Body Rebuild
The valve body is the hydraulic control center, demanding meticulous attention during a 4L60E rebuild. Thoroughly clean all passages, removing debris that can cause malfunctions. Inspect valves and springs for wear or damage, replacing them as needed with components from a TransTec overhaul kit.
Pay close attention to sealing surfaces; even minor imperfections can lead to pressure leaks. Utilize specialized tools for proper spring compression and valve seating. A professional ATSG rebuild guide is invaluable for correct solenoid and check ball placement, ensuring smooth and accurate shifting.
Pump Rebuild
The 4L60E pump requires careful inspection for wear on the gears, housing, and vanes. A worn pump drastically reduces line pressure, impacting overall transmission performance. Utilize a TransTec overhaul kit, which typically includes new pump components for a complete refresh.
Ensure proper clearances between the pump gears and housing; an ATSG manual provides precise specifications. Thoroughly clean the pump body, removing any debris before reassembly. Correct installation is crucial for maintaining adequate fluid flow and reliable operation.
Hard Part Replacement
During a 4L60E rebuild, replacing worn hard parts is essential for longevity. This includes the pump, valve body, and gear train components. Inspect for cracks, scoring, or excessive wear. Utilize an overhaul kit containing OEM performance parts, like those from TransTec, for reliable replacements.
Refer to the ATSG professional rebuild guide for torque specifications and proper installation procedures. Replacing these parts restores the transmission’s original functionality and prevents future failures, ensuring a smooth driving experience.
Clutch Pack Installation
Proper clutch pack installation is critical during a 4L60E rebuild. Utilize a TransTec overhaul kit, ensuring all friction and steel plates are clean and within specification. Carefully follow the ATSG professional rebuild guide for correct stacking order and orientation.
Apply the recommended amount of transmission fluid or assembly lube to prevent scuffing. Verify proper clearance and engagement before proceeding. Incorrect installation leads to slippage and premature wear, compromising performance.

Torque Converter Considerations
Inspect the torque converter for damage and proper function. Stall speed selection impacts performance; choose wisely based on your application and desired driving characteristics.
Inspection and Testing
Thorough torque converter inspection is crucial during a 4L60E rebuild. Examine for signs of damage, like bent fins or a rough bearing surface. Perform a stall test, if possible, to verify proper operation and confirm the advertised stall speed matches your application.
Ensure the converter locks and unlocks smoothly. A faulty torque converter can mimic transmission issues, so accurate testing prevents misdiagnosis and wasted effort during the rebuild process. Proper function is vital for optimal performance.
Stall Speed and Application
Stall speed significantly impacts 4L60E performance, dictated by intended use. Higher stall speeds suit performance builds, enhancing off-the-line acceleration, while lower speeds prioritize fuel efficiency and street driving. Selecting the correct stall speed requires careful consideration of engine output, vehicle weight, and desired driving characteristics.
Mismatched stall speeds can lead to poor performance or damage. A too-high stall can overheat the fluid, while a too-low stall restricts engine power. Proper matching is essential;
Installation Best Practices
Prior to installation, meticulously inspect the flexplate for cracks or damage, ensuring proper alignment. Use new hardware during reinstallation, applying thread locker to critical bolts. Support the transmission adequately during lifting and positioning to prevent strain. Double-check all electrical connections, verifying secure attachment and correct polarity.
Proper fluid filling is crucial; follow manufacturer specifications. A final inspection confirms everything is secure before the initial start-up.

Reassembly and Installation
Final assembly requires meticulous checks for secure connections and proper component seating before carefully reinstalling the transmission and verifying fluid levels.
Final Assembly Checks
Before installation, thoroughly inspect all components for proper seating and secure fastening. Verify the valve body is correctly installed, ensuring all electrical connections are firm and undamaged. Double-check clutch pack clearances and that the pump aligns correctly. Confirm the torque converter is seated fully against the flexplate.
Carefully rotate the output shaft by hand, listening for any unusual noises or binding. This confirms smooth gear engagement and proper lubrication. A meticulous pre-installation check minimizes potential issues during testing and ensures a reliable rebuild.
Transmission Installation
Carefully align the transmission with the engine, ensuring proper engagement with the flexplate and torque converter. Support the transmission securely during installation to prevent damage. Install all mounting bolts, tightening them to the manufacturer’s specified torque.
Reconnect the driveshaft, cooler lines, and all electrical connectors. Double-check all connections for security. Verify the transmission crossmember is properly secured, providing adequate support. A correct installation is crucial for optimal performance and longevity.
Fluid Filling and Level Check
After installation, carefully fill the transmission with the correct type and quantity of fluid, as specified in your vehicle’s owner’s manual. Use a funnel to avoid spills. Start the engine and allow it to idle, then cycle through all gear selections, pausing in each for a few seconds.
Recheck the fluid level with the engine running and the transmission in Park or Neutral, following the dipstick instructions. Proper fluid level is vital for smooth operation and preventing damage.

Testing and Diagnostics
Perform a road test, monitoring for smooth shifts and proper engagement. Scan for Diagnostic Trouble Codes (DTCs) to identify any potential issues quickly.
Road Test Procedures
Following the rebuild, a thorough road test is crucial for verifying proper function. Begin with gentle acceleration, observing shift points and overall smoothness. Gradually increase load, testing during both upshifts and downshifts. Pay close attention to any unusual noises, slipping, or harsh engagements. Monitor fluid temperature to ensure it remains within acceptable limits. Repeat testing under various driving conditions – city, highway, and stop-and-go traffic – to comprehensively evaluate the transmission’s performance and identify any lingering issues requiring attention.
Diagnostic Trouble Codes (DTCs)
After a rebuild, scanning for Diagnostic Trouble Codes (DTCs) is essential. Common 4L60E codes relate to solenoid malfunctions, pressure regulator issues, or internal mechanical failures. Utilize a compatible scan tool to retrieve and interpret any stored codes. Research each code thoroughly to pinpoint the root cause. Clearing codes after repair is vital, but re-monitoring is crucial to confirm the fix. Document all DTCs and resolutions for future reference and troubleshooting efforts.
Common Issues and Solutions
Frequently, 4L60E transmissions exhibit harsh shifting due to worn valve body components or low fluid levels. Another common problem is the 3-4 clutch pack failure, often addressed with an upgraded kit during rebuilds. Torque converter shudder can stem from internal damage or fluid contamination. Thorough inspection during disassembly is key. Proper torque converter stall speed selection impacts performance. Addressing these issues proactively during a rebuild ensures a reliable and smooth-shifting transmission.

Advanced Rebuild Techniques
Performance modifications and component upgrades address weak points. These techniques enhance durability and shift quality, tailoring the 4L60E for specific applications and power levels.
Performance Modifications
Elevating a 4L60E rebuild beyond standard overhaul involves strategic performance modifications. Upgraded clutch packs, featuring enhanced friction materials, dramatically increase torque capacity. A tighter valve body improves shift firmness and precision, while a modified pump boosts line pressure for superior holding power.
Consider a performance-built torque converter with a stall speed matched to your engine’s power band. These changes collectively transform the 4L60E into a robust transmission capable of handling significant horsepower and aggressive driving conditions, ensuring reliability and optimal performance.
Upgrading Components
Component upgrades are crucial for a durable 4L60E rebuild, especially for performance applications. Replace the stock planetary gear set with a stronger aftermarket version to handle increased torque. Invest in hardened input and output shafts for enhanced durability. Consider a heavy-duty band for improved holding power during shifts.
Upgrading to a more robust valve body with modified circuits optimizes shift quality and pressure control. These enhancements significantly improve the transmission’s ability to withstand stress and deliver consistent performance.
Addressing Weak Points
The 4L60E has known weak points requiring attention during a rebuild. The 3-4 clutch pack is prone to failure; upgrading to a wider clutch pack and hardened steels is essential. The pump can experience cavitation, so a high-volume pump is a worthwhile investment.
Address the rear seal area, often a source of leaks, with a speed sensor support upgrade. Reinforcing these areas dramatically increases the transmission’s longevity and reliability, preventing common failures.

Resources and Further Information
ATSG manuals and online forums provide invaluable support. Parts suppliers offer overhaul kits and individual components for a successful 4L60E rebuild.
ATSG Manuals and Guides
ATSG (Automatic Transmission Service Group) provides the industry-standard professional rebuild guides for the 4L60E transmission. These manuals are considered essential resources, offering detailed step-by-step instructions, diagrams, and specifications crucial for a proper rebuild. They cover everything from disassembly and inspection to component rebuilding and final assembly.
Investing in an ATSG manual ensures access to the most accurate and up-to-date information, minimizing errors and maximizing the quality of your work. They are available in both print and digital formats.
Online Forums and Communities
Numerous online forums and communities are dedicated to the 4L60E transmission, offering a wealth of knowledge and support from experienced builders and enthusiasts. These platforms provide a space to ask questions, share experiences, troubleshoot issues, and learn from others’ rebuild journeys.
Active participation can be invaluable, offering solutions to unique challenges and access to specialized expertise. Search for dedicated 4L60E forums to connect with a helpful network of fellow transmission enthusiasts.
Parts Suppliers
Sourcing quality parts is crucial for a successful 4L60E rebuild. Several suppliers specialize in transmission components, offering overhaul kits, individual parts, and performance upgrades. TransTec is a notable brand providing comprehensive overhaul kits containing essential replacements. Research reputable suppliers known for quality and accurate parts listings. Consider options offering both OEM and aftermarket components to balance cost and performance, ensuring a reliable rebuild.